

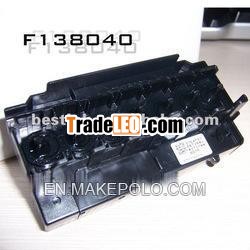
Brand:Bestink
MOQ:1
Quantity:100
Description: F138040 printer head; printer head for epson;printer head for 9600 printer
Product Name | Original Printer Head for EPSON 9600 Printer |
Model | F138040 |
Use | EPSON 9600 Printer |
Type | F138040 |
Disassembly Instruction:
1. Execute ink discharge operation to discharge the ink from allthe ink passages.
2. While pushing the cutter area gently, shift the carriage to theleft about 2 cm to unlock
the carriage and then move the carriage to theprinter center.
3. Loosen the one screw (CP(W): M3×6) securing the front end ofthe damper holder and
separate the Damper Unit from the printhead.
4. Loosen the left screw for the Head Holder, remove the rightscrew (M3×6) and release
the Head Holder downward.
5. Take out the head by lifting its inner side and release the 2FFCs.
NOTE:
A.When unlocking the carriage, do not move the carriage by about2
cm or more with the cutter pushed into the innermostposition;
otherwise, the cutter edge would be damaged.
B.When replacing the print head with a new one, execute ink
discharge beforehand.
C.When removing the head, hang the hook of the Damper Unit inthe
hole of the bottom plate of the CR Board Assy so thatwork will not
be obstructed by the Damper Unit.
In addition, for easier work, you are advised to liftwith Scotch tape
to such a degree that no significant load is appliedto the ink tubes.
D.There is a hook 2 cm high at the center of the head. Installthe
Damper Unit with care not to hit it against thehook.
When installing the Damper Unit, before tightening thescrew,
press the lower area of the Damper with your fingersso that it
comes in close contact with the print head.
E.Take care not to touch the nozzle side of the print head tobe
installed and not to let dust or dirt adhere to thenozzles.
When installing the carriage, take care not to scratchthe nozzle
side.
F.When replacing the print head, the following adjustment
procedures are required.
DX5 Printhead for Epson 7600 Printer

